
One of my all time favorite meals is a crispy chicken cutlet with a big ole fresh salad on top. It’s my idea of a perfect girl dinner. There’s just something about the combination of a warm, crispy chicken cutlet with a fresh, lemony salad that gets me every single time. It’s simple, it’s delicious, and it’s the kind of meal I could eat over and over and over again.
This Crispy Parmesan Chicken with Arugula Salad is my most frequently made version of that classic combination. The chicken is coated in a crispy, golden armesan crust and topped with a peppery arugula salad tossed in a simple lemon dressing. It’s got a little bit of everything: crunch, freshness, saltiness, and just the right amount of acidity to balance it all out.
So whether you’re looking for a quick weeknight dinner, a meal to make for your girlfriends coming over, or just want a little self care after a long day, this meal is for you.
Why You’ll Love This Recipe
- The perfect balance of crispy and fresh. A golden, crispy chicken cutlet needs a little freshness to cut through it, and this peppery arugula salad with lemon vinaigrette does just that.
- Easy enough for a weeknight. It might look like something you’d order at your favorite Italian restaurant, but it’s surprisingly simple to make at home.
- That Parmesan crust! Adding freshly grated Parmesan to the panko breadcrumbs gives the chicken an extra layer of salty, cheesy flavor.
- Easy to customize. Not an arugula fan? Swap it for your favorite greens, like my garlic confit caesar salad. You can also make the chicken in the air fryer if you’d rather skip the pan-frying, it just doesn’t come out quite as crispy.
- Great for leftovers. Make a few extra cutlets and use them for sandwiches, wraps, or salads throughout the week.
Ingredient Breakdown
- Chicken breasts: I like to slice chicken breasts horizontally into thinner cutlets, then pound them to an even thickness. This helps them cook quickly and evenly without drying out.
- All-purpose flour: The first step in our breading station! Flour helps the egg stick to the chicken, which in turn helps the crispy coating stay put.
- Eggs: Act as the glue that holds our Parmesan breadcrumb coating onto the chicken.
- Panko breadcrumbs: My preference over traditional breadcrumbs because they create a lighter, crispier crust.
- Parmesan cheese: Freshly grated Parmesan adds a delicious salty, nutty flavor to the breading. I recommend grating it yourself rather than using the pre-grated stuff.
- Arugula: Its naturally peppery flavor is the perfect contrast to the rich, crispy chicken. Feel free to substitute for romaine, mixed greens, or even shaved brussel sprouts. I keep the salad intentionally simple, but sometimes add some toasted pine nuts for crunch.
How to Make Crispy Parmesan Chicken with Arugula Salad
Step 1: Prepare the Chicken
Slice each chicken breast in half horizontally to create four thinner cutlets. Place them between sheets of plastic wrap or parchment paper and gently pound until they’re about ⅓-inch thick and even throughout.
Step 2: Set Up Your Breading Station
Prepare three shallow bowls or plates: one with seasoned flour, one with beaten eggs, and one with panko breadcrumbs mixed with freshly grated Parmesan and pepper (go easy on the salt as the parmesan is already salty).
Step 3: Bread the Chicken
Pat the chicken dry and season with salt and pepper. Use one hand for dry ingredients, one hand for wet, using the dry hand to coat each cutlet in flour, shaking off any excess. Then use the wet hand to dip into the beaten eggs, followed by the dry hand again for the parmesan-panko mixture, pressing gently to help the breadcrumbs adhere.
Step 4: Pan-Fry Until Golden
Heat enough avocado or high smoke point oil to coat the bottom of a large skillet over medium heat. Once hot, carefully add the chicken, working in batches as needed. Cook for approximately 2 minutes on the first side and another 1–2 minutes on the second, until golden brown and cooked through (you can check for an internal temperature of 155°F). Cooking times will vary depending on the thickness of your chicken and the temperature of your oil. Transfer to a wire rack and immediately season with a little salt. Let rest for 5 minutes while you cook the rest of your cutlets.
Step 5: Make the Lemony Arugula Salad
Combine the olive oil, fresh lemon juice, Dijon mustard, salt, and pepper in a small jar and shake until emulsified. Add the arugula to a large bowl and drizzle with a little dressing at a time, tossing gently until lightly coated. Finish with shaved parmesan.
Step 6: Assemble and Serve
Place a crispy parmesan chicken cutlet on each plate and top with a generous handful of the lemony arugula salad. Finish with freshly cracked black pepper and enjoy!
How to Make Crispy Parmesan Chicken in the Air Fryer
If you’d rather air fry these over pan frying, they are even easier, just don’t get quite as crispy as stovetop.
- Preheat your air fryer to 400°F for 5 minutes.
- Prepare and bread the chicken following the instructions above. For the air fryer method, I recommend keeping the cutlets slightly thicker so they don’t dry out before the breading gets crispy.
- Arrange the chicken in a single layer in the air fryer basket, leaving space between each piece. Spray both sides generously with avocado oil or olive oil spray.
- Air fry at 400°F for approximately 8 minutes, or until golden brown and the chicken reaches an internal temperature of 165°F.
- Season with salt and serve with the lemony arugula salad.
A note on air frying: When I originally tested this recipe, I found that pounding the chicken too thin caused it to overcook before the outside got golden and crispy. Keeping the cutlets slightly thicker helps prevent this. I also found that cooking the chicken on one side without flipping worked well for getting an evenly golden crust. Just keep an eye on it, since every air fryer cooks a little differently!
Tips & Tricks for Perfectly Crispy Parmesan Chicken
- Pound your chicken evenly. This is one of the most important steps! Uneven chicken means some parts will overcook while others are still raw. I personally don’t like to pound mine too thin, so I generally aim for 1/2″ thickness when pan-frying.
- Use panko instead of regular breadcrumbs. Panko has a lighter, flakier texture that creates an extra-crispy coating.
- Press the breading into the chicken. Don’t just dip and call it a day! With a flat hand, press the Parmesan-panko mixture onto each cutlet. This helps the breading adhere better to the chicken.
- Make sure your oil is hot before adding the chicken. If the oil isn’t hot enough, the breading will absorb excess oil and turn greasy rather than crispy. You should hear a steady sizzle when the chicken hits the pan. To test it, add a breadcrumb to the oil. It should simmer immediately.
- Don’t overcrowd the skillet. Frying too many cutlets at once lowers the oil temperature and prevents the chicken from getting that beautiful golden crust. Work in batches to avoid this.
- Use a wire rack to drain the chicken. This allows air to circulate underneath the cutlets, keeping the bottoms crispy instead of trapping steam against the breading.
- Dress your salad right before serving. Arugula is delicate and can wilt quickly. Start with a little dressing and add more as needed. You want the greens lightly coated, not drenched.
Variations & Substitutions
Once you’ve got the breading technique down, there’s a million ways to switch this up!
- Switch up the salad. Some of my favorites are a classic caesar, a shredded brussel sprout salad, a slaw, or a fattoush-style salad.
- Add a marinade to the chicken. I love coating my chicken in honey mustard, miso honey, or even buffalo sauce before the flour step.
- Switch up the seasonings in the breadcrumb topping. Add sesame seeds or zaatar to the breading to pair with a fattoush salad, or fresh sage or rosemary for a fall take on the cutlet.
Also including some of the many variations I’ve done below for some inspiration!
- Parmesan chicken with classic caesar salad
- Honey mustard marinated chicken with shredded brussel sprout salad or apple fennel slaw
- Buffalo marinated crispy chicken with blue cheese slaw
- Zaatar panko crusted chicken with fattoush
- Miso marinated chicken with honey ginger slaw
For a heartier meal, I also love serving these cutlets with my signature Spicy Vodka Pasta.
Print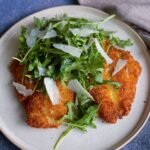
Crispy Parmesan Chicken w/ Arugula Salad
- Total Time: 30
- Yield: 3-4
Description
Golden, crunchy parmesan chicken topped with a bright, lemony arugula salad is the kind of meal I could eat over and over again.
Ingredients
For the Crispy Parmesan Chicken:
- 1 lb boneless skinless chicken breasts (about 2 large breasts)
- ½ cup all purpose flour
- 2 eggs
- 1½ cups panko breadcrumbs
- ¾ cup freshly grated parmesan cheese
- Salt and pepper to taste
- Avocado oil or neutral frying oil
For the Lemony Arugula Salad:
- 4 cups arugula
- 2 tbsps olive oil
- Juice from 1 lemon
- 1 tsp dijon mustard
- Shaved parmesan
- Salt and pepper to taste
Instructions
For the Crispy Parmesan Chicken with Arugula Salad:
- Place your palm flat on top of each chicken breast and carefully slice horizontally to create 4 thinner cutlets. Cover the cutlets with plastic wrap or parchment paper and use a meat mallet, rolling pin, or heavy skillet to gently pound them to an even ½” thickness. This ensures the chicken cooks evenly and the inside is fully cooked by the time the breading is golden and crispy.
- Prepare three shallow bowls or plates: one with flour seasoned with a pinch of salt and pepper, one with the beaten eggs, and one with the panko breadcrumbs, grated parmesan, and pepper. Go easy on the salt as the parmesan is already salty.
- Season both sides of the chicken with salt and pepper. Using one hand (your dry hand), coat a cutlet in flour, shaking off any excess. Transfer it to the eggs and use your other hand (your wet hand) to coat both sides. Lift the chicken out, letting any excess egg drip off, then transfer it to the panko mixture.
- Switch back to your dry hand and press the panko-parmesan mixture firmly onto both sides of the chicken until completely coated. Transfer to a plate and repeat with the remaining cutlets.
- Add enough oil to a large skillet to generously coat the bottom (approximately ½ cup, depending on the size of your skillet). Heat over medium heat until hot but not smoking. To test if the oil is ready, dip the tip of a wooden chopstick or spoon handle into the oil. If small bubbles form around it, you’re ready to fry. You can also test this by adding a breadcrumb and seeing if it immediately sizzles.
- Carefully lower the chicken into the hot oil, placing it away from you to avoid splattering. You should hear a steady sizzle when it hits the pan. Work in batches as necessary to avoid overcrowding the skillet.
- Fry for approximately 2 minutes on the first side, or until the edges are golden brown. Flip and cook for another 2 minutes, or until golden and crispy on both sides and the chicken is cooked through.
- Transfer the cooked chicken to a wire rack set over a baking sheet (preferred for keeping the bottom crispy) or a paper towel-lined plate. Immediately season with a little salt while the chicken is still hot.
- Add the Dijon mustard, fresh lemon juice, olive oil, salt, and pepper to a mason jar. Secure the lid and shake vigorously until combined.
- Add the arugula to a large bowl and drizzle with a little dressing at a time, tossing gently to coat. You may not need all the dressing, so start light to avoid weighing down the greens. Use a vegetable peeler to shave fresh Parmesan over the salad.
- Place a crispy Parmesan chicken cutlet on each plate and top with a generous handful of the lemony arugula salad. Finish with freshly cracked black pepper and enjoy!
- Prep Time: 15
- Cook Time: 15
- Category: Dinner
- Method: Stovetop
Storage & Reheating
While this recipe is definitely best enjoyed fresh, you can absolutely save leftovers for another day!
To Store: Allow the chicken to cool completely before transferring it to an airtight container. Refrigerate for up to 3–4 days. Store the arugula, dressing, and Parmesan separately to prevent the salad from getting soggy.
To Reheat: For the crispiest results, reheat the chicken in an air fryer at 350°F for approximately 3–5 minutes, or in a 375°F oven for 8–10 minutes, until heated through to 165°F. The exact timing will depend on the thickness of your cutlets. I recommend avoiding the microwave if possible, since it tends to soften the breading and overcook the chicken.
Frequently Asked Questions
Can I make this recipe without frying the chicken?
Yep! I’ve included an air fryer method above that gives you a crispy Parmesan crust without needing to pan-fry. Just be mindful of the chicken’s thickness to avoid overcooking.
Why is my breading falling off the chicken?
This usually happens when the chicken is too wet before breading, there’s too much excess flour, or the coating hasn’t been pressed firmly enough onto the chicken. Pat the chicken dry before starting, shake off excess flour, and gently press the panko mixture into each cutlet.
Can I use regular breadcrumbs instead of panko?
Yes! Regular breadcrumbs will work, but the coating will be finer and less crunchy. For that extra-crispy, restaurant-style chicken cutlet, I definitely recommend panko.
Can I use chicken thighs instead of chicken breasts?
Yes, boneless, skinless chicken thighs can work well here. Pound them to an even thickness and adjust the cooking time as needed, making sure they reach an internal temperature of 165°F.
What should I serve with Parmesan chicken?
I usually eat this as a full meal, but also do love serving this with my Spicy Vodka Pasta. You could also serve with roasted potatoes, sweet potatoes, or pilaf.
Can I make this recipe gluten-free?
Yes! Substitute the all-purpose flour with a gluten-free flour blend and use gluten-free panko breadcrumbs. The remaining ingredients are naturally gluten-free, though you should always double-check your specific products.


Can you prepare this is an air fryer? 🥰
Just posted the air fryer instructions! Let me know if you have any questions 🙂