I had this idea last year that I never fully fleshed out: turning iconic Ben & Jerry’s flavors into other desserts. Think Cherry Garcia as a tart or pie, or Chunky Monkey as a banana pudding. But the one flavor that’s been living rent-free in my brain for years—the one I knew I had to turn into cookie form—is one of my all-time favorites: Phish Food.
If you’ve never had it, Phish Food is chocolate ice cream swirled with marshmallow and caramel, studded with little fudge “phish” (basically chocolate chunks shaped like fish). It’s a combination that makes my heart (and my belly) sing, so the challenge became capturing all of that in a cookie.
This recipe took a few more tests than I expected, mostly because I was extremely particular about the final texture. I wanted what my boyfriend calls a “medium-rare cookie”: crisp edges with a gooey, chewy center. The middle needed to be fudgy, almost brownie-like, to mimic the ice cream’s richness. Then there were the marshmallow and caramel swirls. If they’re too close to the surface, they ooze out and caramelize on the pan – delicious, but more crunchy vs a silky swirl.
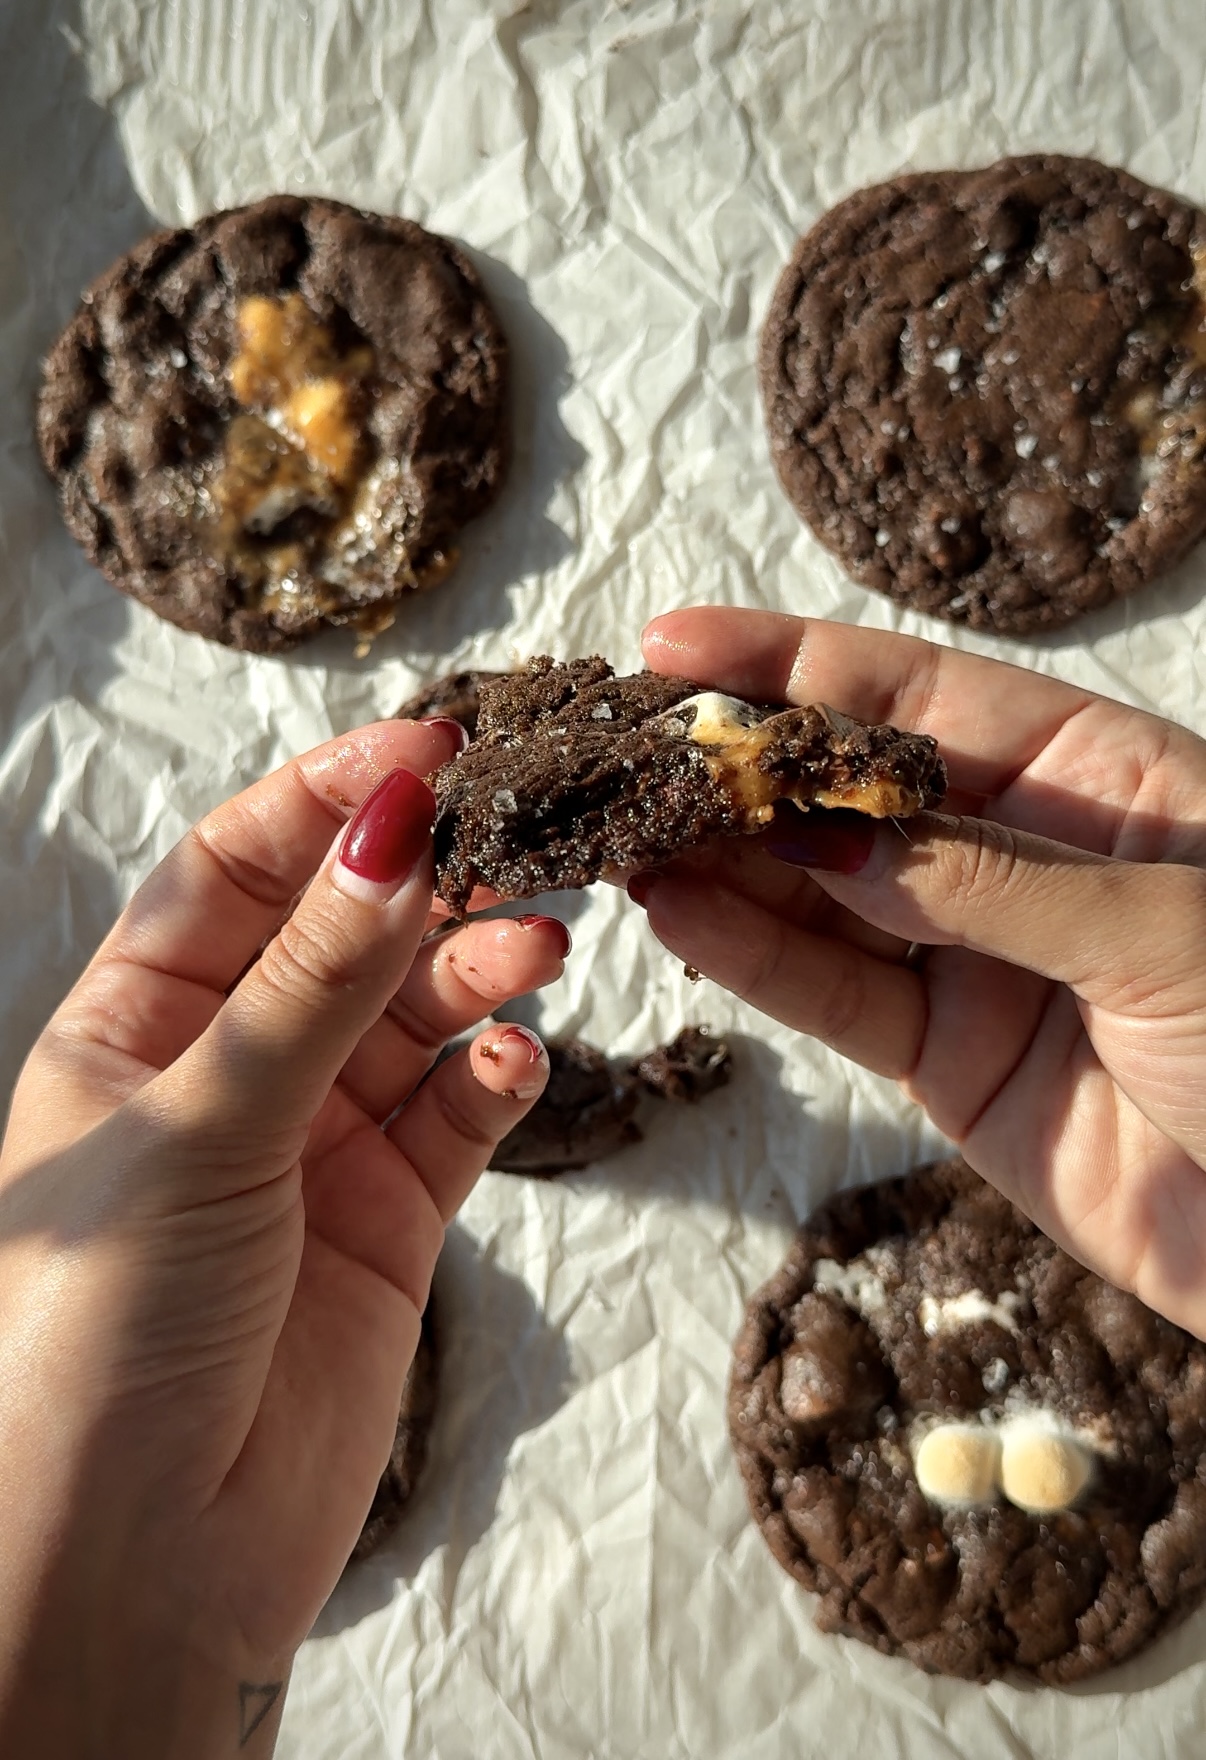
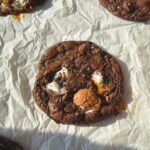
After many rounds of tweaking, allow me to formally introduce my Phish Food Cookies: a fudgy chocolate cookie with crisp edges, pockets of chopped chocolate throughout, ribbons of caramel and marshmallow running through each bite, and a final sprinkle of flaky sea salt to seal the deal. They truly are everything I could ever dream of in a cookie, and I just know y’all are going to love them too.
While cookies are relatively uncomplicated in the baking world, there are a few things that will help ensure a really great cookie.
Cookie Tips & Tricks:
- Using room temperature ingredients. Your butter needs to be soft in order to cream with the sugars properly. Keep the butter on your countertop for 1-2 hours before starting to ensure it fully comes to room temp. If you’re in a pinch, you can always use the handy dandy trick from Broma Bakery by putting the butter in your waistband so your body heat brings it to temp, but fair warning sometimes this can result in a greasy belly (lol)
- Not overmeasuring your ingredients. I used to be anti scale because I didn’t want one more kitchen item, but it really helps with most accurate measurement of your ingredients, especially for baking. It also helps with dishes since you don’t need to have every single measuring cup and spoon out. If you don’t have a scale, when measuring your flour and cocoa powder, be sure to fluff them first before gently spooning into a measuring cup, keeping air between so you don’t compact it too much, then level off the excess with the back of a knife. Compacting the flour can result in using too much flour, which will result in a dry cookie. Ex: first time I made these, my cup of flour was closer to 142g, when it should have been 125g and resulted in a way too dry dough.
- Don’t overmix the dough. The reason we mix the dry ingredients first in a bowl before adding them to the wet is so that we can stop mixing as SOON as the dough comes together and you don’t see anymore flour streaks. Overmixing causes the gluten in the flour to develop, resulting in a tougher cookie.
- Chilling these cookies is a MUST – at least 2 hours. Not chilling your cookies will result in them spreading way too much and result in a thinner, crispier cookie vs fudgier. They will still spread, so be sure to space them out about 3” from each other on the baking pan and bake on two baking sheets as needed.
- Placement of the marshmallows and caramel matters. I like to stuff the cookies with the marshmallows and caramel, only having a little bit to peek out. This protects them a bit more from the heat so they don’t get too toasty and melty and end up crunchy. For aesthetics, you can pop on a marshmallow or caramel piece after rolling the cookies, just keep them towards the top so they don’t make contact with the baking pan as they spread.
- Err on the side of underbaking vs overbaking. I like to pull the cookies right around 11 minutes, where the edges are set but the center is still puffed up and soft looking. They will continue cooking as they cool, but pulling them earlier ensures you get that gooey fudgy center. If you are cooking from frozen, add an additional minute to the baking time.
- Perfectly round cookies every time! Since cookies have a tendency to spread as they bake, sometimes they don’t spread into a round cookie. A trick to get perfectly round cookies every time is as soon as they come out of the oven and are still hot, grab a large mason jar lid or a glass. Place over top the cookie and move it around in a circular motion a few times to help round and shape the cookies.
- Store the baked cookies in an airtight container or ziplock at room temp for up to a week, or freeze as dough balls for up to a month. Pop the cookies in the microwave for 5 seconds to reheat.
- I used little chocolate fish to keep the whimsical nature of the ice cream, but a regular chocolate bar works perfectly fine since we’re chopping it up anyways!
Phish Food Cookies
- Total Time: 2 hours, 35 minutes
- Yield: 8-10 cookies
Description
These Phish Food Cookies are rich, fudgy chocolate cookies filled with gooey caramel and marshmallow swirls, crisp edges, and a brownie-like center inspired by the iconic Ben & Jerry’s flavor.
Ingredients
Ingredients:
For the Phish Food Cookies:
- 1 stick (½ cup) unsalted butter, softened
- ¾ cup packed brown sugar (165g)
- 2 tbsps white sugar (25g)
- 1 large egg + 1 egg yolk, room temperature
- 2 tsps vanilla extract
- 1 cup all purpose flour, gently spooned and leveled (125g)*
- ⅓ cup Dutch-processed cocoa powder, spooned and leveled (35g)
- 1 tbsp whole milk
- 1 tsp instant espresso powder (optional)
- 1 tsp salt
- ½ tsp baking soda
- ¼ tsp baking powder
- 4oz dark or milk chocolate, roughly chopped chocolate (113g)
- 48 mini marshmallows, frozen
- 8–10 soft caramels (like Wershers)
Instructions
Directions:
For the Phish Food Cookies:
- Pre-baking note: These cookies need to chill in the fridge for 2 hours before baking. This prevents them from spreading too much and ensures a fudgy center.
- In a large bowl, cream the butter, brown sugar, and granulated sugar with a hand or stand mixer until light and fluffy. Add the egg, egg yolk, and vanilla, and mix until fully combined.
- Now mix your dry ingredients. In a separate bowl, whisk together the flour, cocoa powder, espresso powder, salt, baking soda, and baking powder.
- Gently fold the dry ingredients into the wet until just a few streaks of flour remain. Add the milk and chopped chocolate and fold until just combined. Do not overmix.
- Using a 2-inch (about 3 tbsps) large cookie scoop, scoop the cookie dough into balls and place on a parchment-lined baking sheet. Cover the dough with plastic wrap and refrigerate for at least two hours. If you haven’t already done so, place the mini marshmallows in the freezer so they stay soft after baking.
- Preheat the oven to 350°F. Working with chilled dough, flatten each portion and place a caramel and 6–7 frozen mini marshmallows in the center. Fold the dough over the filling to seal, rolling it back into a ball. It’s okay if a few marshmallows peek out, but cover as much as you can to keep the centers soft. Repeat with all portions.
- Place the filled dough balls on a parchment-lined baking sheet, spacing them at least 3 inches apart. Bake in batches, keeping the remaining dough chilled. If you’d like, dot the tops with extra marshmallows or halved caramel pieces.
- Bake in a 350°F oven for 11–12 minutes, until the edges look set but the centers still appear soft.
- Let the cookies cool on the baking sheet for 5 minutes—they’ll be very soft—then transfer to a wire rack to cool for another 5–10 minutes. Store in an airtight container at room temperature for up to 1 week, or freeze the unbaked dough balls for up to 3 months.
Notes
**If you are using a measuring cup vs a scale for the measurements, be sure to fluff the flour before measuring, then gently spoon the flour into the measuring cup before leveling off to get the most accurate measurement. Compacting your flour too much can result in excess flour and a tough cookie, which is not what we want!
- Prep Time: 20
- Cook Time: 10-12