If there’s one thing I will never be, it’s the girl who makes a pie look pretty. Trust me—I’ve tried. Homemade crust, store-bought crust… doesn’t matter. My pie edges always look like someone let a toddler loose with play-dough. But what is in my DNA? Making things taste really, really good. And when it comes to pumpkin pie, that’s all that actually matters.
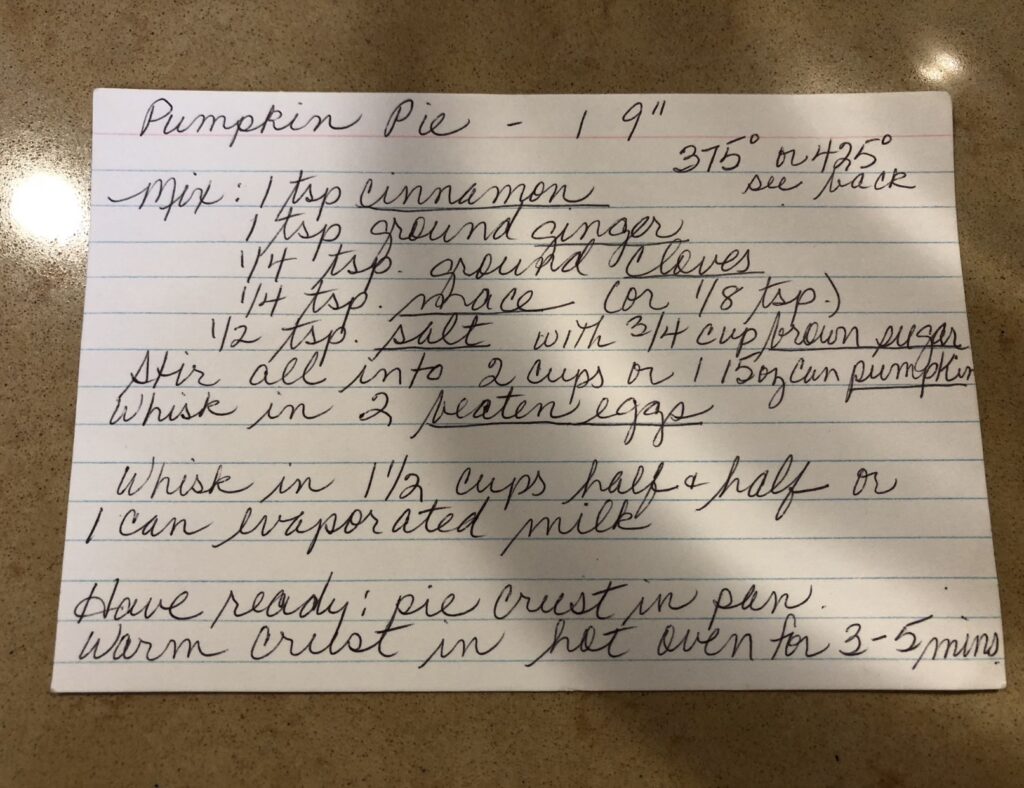
This recipe is my grandma’s OG, crowd-favorite pumpkin pie—the one she makes every Thanksgiving and still my favorite to this day. I’ve tested it no less than five times this season (not because the filling needed tweaking—the filling is perfect—but because I kept trying to make the crust look cute). Spoiler: I failed. But the taste? Divine. Perfectly spiced. Silky, custardy texture. The kind of pie you eat a slice of for breakfast the day after Thanksgiving without a single ounce of regret.
Honestly, I almost didn’t post this because she’s got great personality but leaves something to be desired in the looks department. But I couldn’t let y’all go another Thanksgiving without this recipe. Maybe your crust skills are better than mine, or maybe you, too, don’t care what a pie looks like as long as every bite is “oh my god, this is so good.” Either way—this one’s for you.
To make this ahead of time, make the pie a day or two in advance. You can make the whipped cream a few hours before serving and keep in the fridge, or make just before serving.
Let’s talk crust options, because in this house we believe in choices:
Option 1: The Homemade Route
The more elaborate, labor-of-love version—parbaked homemade crust, extra flaky, extra crisp, and undeniably delicious. I use the Cook’s Illustrated pie crust recipe and it never fails… but between the chill times and the shaping, there’s a reason one designated person gets stuck making pies every Thanksgiving.
Option 2: The “Lazier Girl” Method (AKA My Grandma’s Way)
This is how we’ve made pumpkin pie for decades: store-bought crust, no parbaking, just mix the filling and go. The only downside is a slightly softer, undercooked bottom crust since the filling cooks faster than the dough. Preheating a sheet pan helps, but it’s not a perfect fix. Still—this is the one we come back to, because it tastes amazing and to be honest, nobody at our table cares enough about the crust to change our ways.
Option 3: The Hybrid Approach (my personal favorite)
My favorite method and the best of both worlds – Store-bought crust but parbaked with pie weights for about 15 minutes. No excessive chilling, shaping, or emotional damage from trying to crimp edges. Just line a storebought pie crust with parchment paper and pie weights or dried beans and bake at 400°F for 15 minutes before removing the pie weights and adding the filling. This gives the base crust a head start to get crisp before adding the custard.
No matter which option you choose, the filling is the star. And this is my grandma’s recipe—so you already know it’s good.
Ingredients Breakdown:
- Dark Brown Sugar – the molasses flavor in a pumpkin pie is one of my favorite parts of fall. Over the years, we have tested variations with light brown sugar, brown sugar + molasses, white sugar + brown sugar, and far and above the recipe that everyone loves the most is the one with dark brown sugar. Dark brown sugar has a higher concentration of molasses, but adds less moisture than adding actual molasses, so you get the flavor without the effect on texture. I highly highly highly recommend using dark brown here.
- Canned pumpkin – Libby’s brand is our personal favorite for pumpkin pie, both in texture and flavor
- Half & Half – I have tested this recipe with evaporated milk and a combination of heavy cream and other milks, and I find the texture using full half & half is best. It’s creamy without being overly heavy and without overpowering the spices.
- Spices – getting the right blend of spices in a pumpkin pie is an art form, and no one does it quite like my grandma. She is the one who introduced me to mace, a less common spice than the typical cinnamon and nutmeg, but one that adds this subtle warmth to the pumpkin pie. She also does the same amount of ground ginger as cinnamon, which somehow doesn’t make the flavor too gingery, but just the right amount of spice. Mixing the spices with brown sugar and then the pumpkin before adding the half & half and eggs ensures the spices get evenly distributed.
- Eggs – these are the binder for your custard. Whisk the eggs prior to adding to ensure they are properly distributed in the custard.
- Salted Maple Whipped Cream – while my family has traditionally topped this pumpkin pie with an insane amount of canned whipped cream, I really love making my own with maple syrup and just a touch of salt to enhance and provide contrast to the sweetness of the pie.
Aba’s Pumpkin Pie with Salted Maple Whip
- Total Time: 75
- Yield: 8
Description
This easy, perfectly spiced pumpkin pie is adapted from my grandma’s beloved recipe, delivering a silky, custardy filling with warm fall flavor and your choice of homemade or store-bought crust.
Ingredients
For the Pumpkin Pie:
- 1 (9”) homemade or store bought pie crust
- ¾ cup packed dark brown sugar (165g)
- 1 tsp cinnamon
- 1 tsp ground ginger
- ¼ tsp ground cloves
- ¼ tsp ground nutmeg
- ¼ tsp mace
- ½ tsp salt
- 2 tsp vanilla bean paste or vanilla extract
- 1 15oz can pumpkin (Libby’s preferred)
- 1½ cups half & half, room temperature
- 2 eggs, room temperature, whisked
For the Salted Maple Whip:
- 1 cup cold heavy cream
- 3 tbsps maple syrup
- 1 tsp vanilla bean paste or vanilla extract
- 1/16 – ⅛ tsp salt
Instructions
For the Pumpkin Pie with Salted Maple Whip:
- Place a rack in the lower third of the oven, place a rimmed baking sheet on the rack, and heat the oven to 400°F.
- Roll out your homemade or store bought pie dough and place in a greased 9” pie dish. Fold the edges under and crimp using your fingers or knuckles. Place in the fridge to chill for 5-10 minutes while the oven preheats.
- Line the crust with parchment paper and fill with pie weights or dried beans. Add to the baking sheet and bake for 15 minutes.
- Remove the pie and lower the oven to 350°F.
- Meanwhile, make your filling. In a bowl, mix together the brown sugar, cinnamon, ground ginger, cloves, nutmeg, mace, and salt. Whisk in the pumpkin and vanilla until completely combined.
- Add in the half & half and eggs and whisk until combined.
- Remove the parchment paper and weights and carefully pour the pumpkin pie filling into the parbaked crust and return to the oven on top of the baking sheet.
- Bake at 350°F for 40-50 minutes or until the edges are set and slightly puffed up, and the center jiggles slightly when lightly shaken. Cool completely, a minimum of 4 hours, preferably overnight before serving. The custard will continue to cook as it sets.
- When ready to serve, add heavy cream to a bowl with maple syrup and vanilla bean paste and whip until soft peaks form. Fold in the salt, using 1/16th – ⅛ of a tsp depending on how pronounced you want the salted maple flavor to be.
- Serve the pumpkin pie with a dollop of the salted maple whipped cream and enjoy!
- Prep Time: 15
- Cook Time: 60
- Category: Dessert